Ever had your computer crash after a bad update or mysterious software glitch? Don’t panic—System Restore might just be your digital lifeline. This built-in Windows feature quietly saves your system’s state, letting you roll back time when things go south. Let’s dive into how it works, when to use it, and how to master it like a tech pro.


What Is System Restore and How Does It Work?
System Restore is a recovery tool developed by Microsoft for Windows operating systems. It allows users to revert their computer’s system files, settings, and installed programs to a previous point in time—called a restore point—without affecting personal files like documents, photos, or emails.
Understanding the Core Mechanism
System Restore operates by monitoring changes to critical system files, the Windows Registry, and certain program files. When significant system events occur—such as installing new software, drivers, or Windows updates—System Restore automatically creates a restore point. These points act as snapshots of your system’s configuration at a given moment.
The feature uses a technology called Volume Snapshot Service (VSS) to capture and preserve system state data. VSS ensures that files in use are copied accurately, even if they’re locked by the operating system. This allows for consistent and reliable rollbacks.
What System Restore Does (and Doesn’t) Affect
- Preserves: Personal files (documents, music, videos, emails).
- Changes: System files, Windows updates, registry settings, and installed applications.
- Does NOT remove: Viruses or malware unless they’re part of a system file reverted during rollback.
- Does NOT recover: Files deleted before the restore point was created.
“System Restore is not a backup solution—it’s a system configuration rollback tool.” — Microsoft Support
Why System Restore Is a Must-Have Tool
In an era where software updates and driver installations happen automatically, System Restore serves as a crucial safety net. It’s especially valuable for users who frequently install new programs or experiment with system settings.
Preventing Catastrophic System Failures
Imagine installing a new graphics driver that causes your screen to flicker or your PC to blue-screen on startup. Without System Restore, you’d face hours of troubleshooting or even a full OS reinstall. With it, you can revert to a stable state in minutes.
According to a Microsoft support article, System Restore has helped millions of users recover from failed updates and incompatible software.
Saving Time and Avoiding Data Loss
Reinstalling Windows can take hours and risks losing personal data if backups aren’t current. System Restore, on the other hand, typically completes within 15–30 minutes and leaves your files untouched. It’s a fast, low-risk solution for system instability.
For businesses, this means reduced downtime. For home users, it means peace of mind.
How to Enable and Configure System Restore in Windows
While System Restore is often enabled by default, it can be turned off—especially on older systems or after a clean install. Here’s how to activate and configure it properly.
Enabling System Restore on Windows 10 and 11
To enable System Restore:
- Press Windows + R, type
sysdm.cpl, and press Enter. - Go to the System Protection tab.
- Select your system drive (usually C:) and click Configure.
- Choose Turn on system protection.
- Adjust the maximum disk space usage (recommended: 5–10%).
- Click Apply and then OK.
Once enabled, Windows will begin creating restore points automatically.
Customizing Restore Point Settings
You can control how often restore points are created and how much disk space they consume:
- Disk Space Usage: Allocate enough space (5–10%) to store multiple restore points without slowing down your system.
- Manual Restore Points: Create them before major changes using the Create button in the System Protection tab.
- Frequency: Windows creates restore points before updates and installations, but you can trigger one manually.
For advanced users, Microsoft’s Developer Documentation details how System Restore APIs can be used programmatically.
Creating Manual Restore Points: Best Practices
While automatic restore points are helpful, manually creating them before major system changes is a smart habit. This gives you precise control over when and where you can roll back.
When to Create a Manual Restore Point
- Before installing new software or drivers.
- Prior to major Windows updates (e.g., feature updates).
- Before making registry changes or system configuration tweaks.
- When testing beta or experimental applications.
Creating a restore point takes less than a minute and could save you hours of recovery time later.
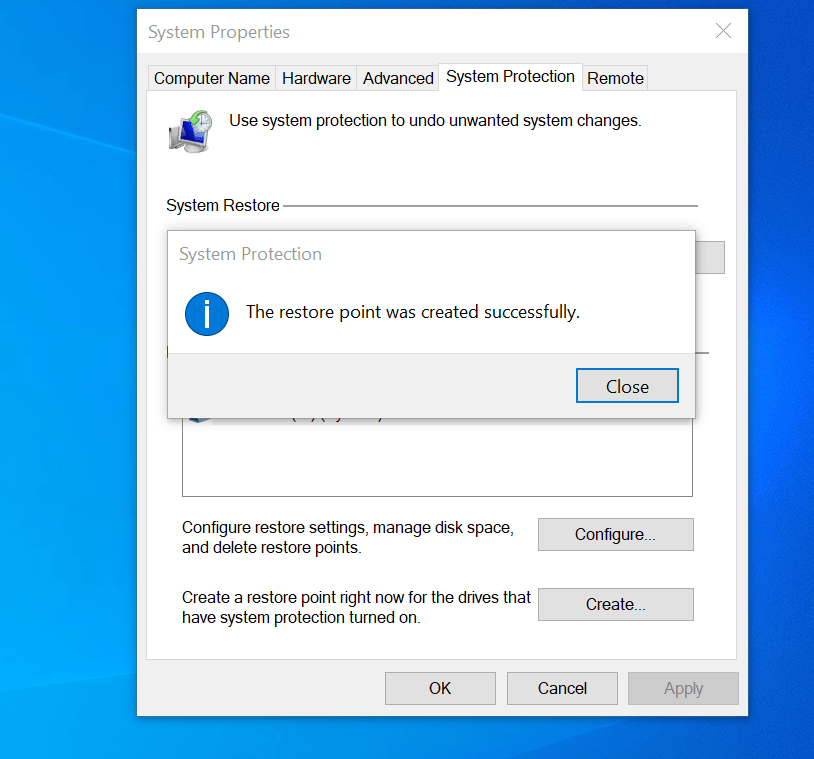
Step-by-Step Guide to Creating a Restore Point
- Open the Control Panel and go to System and Security > System.
- Click System Protection on the left sidebar.
- Select your system drive and click Create.
- Enter a descriptive name (e.g., “Before Installing Adobe Creative Cloud”).
- Click Create and wait for confirmation.
Once created, the restore point will appear in the list under System Protection > Restore.
Performing a System Restore: A Complete Walkthrough
When your system starts acting up, performing a System Restore can be the fastest way to return to stability. Here’s how to do it correctly.
Accessing System Restore from Windows
If you can boot into Windows:
- Open the Start menu and search for Create a restore point.
- Click System Restore in the System Properties window.
- Click Next and select a restore point from the calendar.
- Choose a point with a green dot (automatically created) or your custom label.
- Click Next and confirm the restore.
- Click Finish and wait for the process to complete.
The system will restart and begin the rollback process. Do not interrupt it.
Using System Restore from Safe Mode or Recovery Environment
If Windows won’t start, you can still access System Restore:
- Boot from a Windows installation USB or DVD.
- Select Repair your computer > Troubleshoot > Advanced Options > System Restore.
- Follow the on-screen instructions to select a restore point.
Alternatively, press F8 (or Shift + F8) during boot to enter Safe Mode with Command Prompt, then run rstrui.exe to launch the System Restore wizard.
Common Issues and Troubleshooting with System Restore
Despite its reliability, System Restore can sometimes fail or behave unexpectedly. Understanding common issues helps you overcome them quickly.
System Restore Fails to Complete
If the restore process stops or rolls back, possible causes include:
- Corrupted restore point files.
- Insufficient disk space.
- Antivirus software interfering with the process.
- Hardware issues (e.g., failing hard drive).
Solution: Disable third-party antivirus temporarily, ensure at least 10% free space on the system drive, and run chkdsk C: /f to check for disk errors.
No Restore Points Are Available
If no restore points appear, check:
- Whether System Protection was disabled before the issue occurred.
- Disk cleanup tools (like Disk Cleanup) may have deleted restore points.
- Virus infections that deleted shadow copies.
To prevent this, avoid using third-party cleaners that delete system files and ensure System Protection is always enabled.
System Restore vs. Other Recovery Options: What’s the Difference?
System Restore is just one of several recovery tools in Windows. Understanding how it compares helps you choose the right solution for each scenario.
System Restore vs. Reset This PC
System Restore reverts system files and settings but keeps your files and apps intact. Reset This PC, however, reinstalls Windows and can remove all apps and settings—optionally keeping your files.
Use System Restore for minor issues; use Reset for deep corruption or performance degradation.
System Restore vs. File History and Backup
Unlike System Restore, File History and Backup and Restore focus on personal data. They don’t roll back system changes but can recover deleted or overwritten files.
Ideally, use both: System Restore for system stability, and backups for data protection.
System Restore vs. Third-Party Tools
Tools like Macrium Reflect, Acronis True Image, or EaseUS Todo Backup offer full disk imaging, which is more comprehensive than System Restore. However, they require more storage and setup.
System Restore is lightweight and integrated, making it ideal for quick fixes without external software.
Advanced Tips and Hidden Features of System Restore
Most users only scratch the surface of what System Restore can do. Here are some advanced techniques and lesser-known features.
Scheduling Automatic Restore Points
While Windows creates restore points automatically, you can enhance this with Task Scheduler:
- Open Task Scheduler.
- Create a new task that runs
wmic.exe /namespace:rootdefault path systemrestore call createrestorepoint "Scheduled Restore Point", 0, 100. - Set it to run weekly or before scheduled updates.
This ensures you always have a recent restore point, even if Windows doesn’t trigger one.
Managing Restore Points via Command Line
Advanced users can manage System Restore using Command Prompt or PowerShell:
rstrui.exe– Launches the System Restore wizard.vssadmin list shadowcopy– Lists all existing restore points.wmic systemrestore– View or delete restore points via WMI.
These commands are useful for scripting or remote troubleshooting.
Disabling System Restore on Non-System Drives
By default, System Protection may be enabled on all drives. To save space, disable it on non-system drives (e.g., D: or E:):
- Open
sysdm.cpl. - Go to System Protection.
- Select the non-system drive and click Configure.
- Choose Disable system protection.
- Click Apply.
This prevents unnecessary disk usage while keeping protection on your main drive.
What is System Restore used for?
System Restore is used to revert your computer’s system files, registry settings, and installed programs to a previous state, helping you recover from software conflicts, failed updates, or system errors without losing personal files.
Does System Restore delete personal files?
No, System Restore does not delete personal files such as documents, photos, music, or emails. It only affects system files, settings, and installed applications.
Can System Restore remove viruses?
Not reliably. While System Restore might remove a virus if it was installed after the restore point, many malware programs target restore points or disable System Restore entirely. Always use antivirus software for malware removal.
How often does Windows create restore points?
Windows automatically creates restore points before major events like updates, driver installations, or software setups. It also creates a weekly restore point if no other events trigger one.
What should I do if System Restore fails?
If System Restore fails, try booting into Safe Mode and running it again. If that doesn’t work, use Windows Recovery Environment (WinRE) or a system image backup to restore your PC.
System Restore is one of Windows’ most underrated yet powerful features. When configured correctly, it acts as a silent guardian, ready to rescue your system from instability caused by updates, drivers, or software conflicts. Unlike full backups or system resets, it’s fast, non-destructive, and built right into the OS. By enabling it, creating manual restore points, and understanding its limitations, you gain a reliable tool for maintaining system health. Whether you’re a casual user or a tech enthusiast, mastering System Restore can save you time, stress, and potential data loss. Use it wisely, combine it with regular backups, and never fear a bad update again.
Further Reading: